Showing posts with label Nail Design. Show all posts

Tuesday, January 26, 2016

HPB Presents: Gradient

*Contains Press Sample*


Well, not just today, but the entirety of last week.  I had a baby, y'all.  Mama is tired!  I regret nothing.

NOTHING!

So now I bring you a post with some nail art on the longest nails I think I've ever had - so long that I actually trimmed them down this weekend because they were becoming weapons, and I really didn't want to go through the hassle of registering them.

The always-amazing group Hobby Polish Bloggers put together another awesome link-up for the members, and this month's theme is "gradient."  I've been sitting on the beautiful "Make It Merry" Christmas Trio by 77 Nail Lacquer for about a month, wanting to do something awesome with them, but not sure what. 


This gradient theme was the perfect answer :D  So here's what I came up with:


Holooooooo!!!  Hngggggggg so gorgeous...

So for this look, I used "Santa Baby" for the base color.  I then used the "fishnet" vinyl stencil from What's Up Nails and sponged a gradient over Santa Baby using "Under the Mistletoe" and "Winter's Kiss."  The end result is everything I wanted it to be and then some - probably the best and smoothest gradient I have done thus far in my nail art life.  Huzzah!

So whatcha think?  Let me know in the comments, and be sure to check out the other nail designs through the inlinkz below <3

~~~~~~~~~~~~~~~~~~~~~~~~~

Christmas Trio purchased with a blogger discount.  All opinions and experience with the polish are my own and remain 100% honest.

~~~~~~~~~~~~~~~~~~~~~~~~~


Friday, October 30, 2015

40 Great Nail Art Ideas - Halloween


I'd love to do something epic like this for Halloween at my house, but because the weather is still so hot, the pumpkin rots very fast.  And, I would need to be living somewhere with a Home Owners Association that doesn't have a giant stick up its butt.

Anywho - on to the nails!!


Today's prompt for Crumpet's Nail Tarts is "Halloween" (duh!) and I wanted to do something fun!!  Normally with something as epic and broad as Halloween, I'd try to do something freehand.  To be perfectly Frank (cuz I hear he's a pretty honest guy), I ran out of time and energy for it.  Therefore, I went a simpler route, but I promise, it's still pretty darn cool!

I started with a basecoat of "Mercury" on my pointer, middle, and pinky fingers, and "Endeavor" on my ring finger, both polishes by Different Dimension.


I then freehanded some ghosts using Glow Dove, Glow Purp, and Glow Lava by Parrot Polish, and added a Ghost from Daily Charme, and here is the result:


I gotta say, I'm pretty pleased!!  This is what I was hoping it would look like in the end, and it rarely works out that way for me :P  So yay hooray!!

What do you think of this design??  Did you do anything ghostly on your nails for Halloween?  Let me know!! :D  And have a very safe and fun and happy Halloween!!

~~~~~~~~~~~~~~~~~~~~~~~~~


Thursday, August 27, 2015

Crotch Ice on Idris


I know, funky title, right?  I just lack the mojo to come up with something interesting :P

Today is just a small post showing you a very simple mani using Crotch Ice and Idris by Digital Nails ^_^


I purchased Idris a while ago when I did a huge Digital Nails buy during a sale, and finally had the opportunity to wear it and pair it with Crotch Ice to give it a rich look, almost opalescent.  Crotch Ice is a wonderful flakie bomb that, if layered over a dark grey or black, would probably most definitely look like an opal.  But everyone's doing that lately since that crazy colorful opal has been making the rounds on the internets.  And I don't do what everyone else does.  Because I'm an adult, and I do what I want.  So there.

I decided to add this super awesome 3d cube jewel I recently purchased through Ali Express because it seemed like a neat, unconventional addition to the mani.  That sucker didn't stay on long, it caught on EVERYTHING.  But I'll be damned if I didn't admit it looked pretty shweet.

Whatcha think?? Are you a 3d nail art fan?


Friday, August 21, 2015

HPB Presents NEON!


It's so true... For my husband and I, Saturday's are usually more like Fridays, because that's when the free babysitters (a.k.a. Grandma and Grandpa) already had their Friday night (because they don't have kids at home anymore and can do those fun things like going out again...dammit) and are available to watch the munchkins so we can go do an adult thing.  Like go grocery shopping WITHOUT the kidlets.  Or clean the house WITHOUT children uncleaning as we go.

My God, we are so lame...

ANYWHO, I've got a fun post for you today!  I belong to an awesome group on Facebook called Hobby Polish Bloggers.  It's a great hub for all us polish bloggers to talk about the hobby and ask for advice and such.  And it's just a fantastic gathering of amazing gals ^_^  I'm very happy to be a part of it, and that group has helped me many, many times in this little polish blog journey of mine.

Every month, Steph, the admin of the group, puts together a link-up for all of us to join (if we so choose) and we all create a mani inspired by a specific theme.  I've been trying for months to get a mani done for these link-ups, but either press samples or life got in the way.  I *finally* was able to participate in this round, and at the same time was also finally able to use the new Jior Couture Summer collection I ordered when it launched!!


I was inspired to do a design based off one of my favorite games - Gummy Drop!  All those neon fruit candies in those appealing patterns called to me.  They said, "MAKE US INTO A MANI" in creepy little candy voices.  So I did a random pattern dotticure - I was originally trying to make a neon "wave" pattern, but it didn't really turn out too well :P

Oh!  OH!  But here's the best part - it gloooooooooooooows!!!


Aw yeah!!  That purple though - what a brat.  She did NOT want to glow.  At all.  Had to leave my camera shutter open for 5.5 seconds.  What a snob.

I used all the colors in the summer collections sans Geek in the PINK and GOLD rush, and topped the mani off with Jior's topcoat, which they included as a freebie in my order ^_^  I'll definitely be revisiting this collection again soon with more neon goodness :D
 
What do you think of this design?  Did you get any of the new summer colors by Jior?  Be sure to check out the other manis in the inlinkz below! <3


Tuesday, June 23, 2015

Summer Designs with MoYou Nails!

***Press Sample***

I don't now if YOU know this, but Father's Day this year was also the first official day of summer!  So I created two nail designs to celebrate the new season using MoYou Nails stamping plates, polish, and rhinestones ^_^

The first design is based off one of my top favorite images that come to mind when I hear the word "summer" - sailing!


I did a gradient using "Lei It Again" and "Rum Me The Right Way" by KBShimmer, and painted a wave pattern using "In Yacht Water," also by KBShimmer.  To get the subtle waves look, I used a holo topcoat and OPI's Nail Envy in a watermarble pattern.  I then used my MoYou Nails Black nail polish to stamp the boat silhouettes, and a dark blue stamping polish from somewhere (I honestly don't recall, it's in an unmarked tiny bottle) for the dolphin silhouettes, all from MoYou Nails Plate 70.  I painted a light grey inside the dolphin lines because they just looked odd as outlines :P  I topped it all with my OPI Matte topcoat, and I'm pretty pleased with the end look ^_^

My second design is a bit more fun :)  One of my favorite activities I remember doing as a kid in the summer was making tie-dye t-shirts and whatnot.  So I thought I'd re-create a nail design to sort of emulate that look:


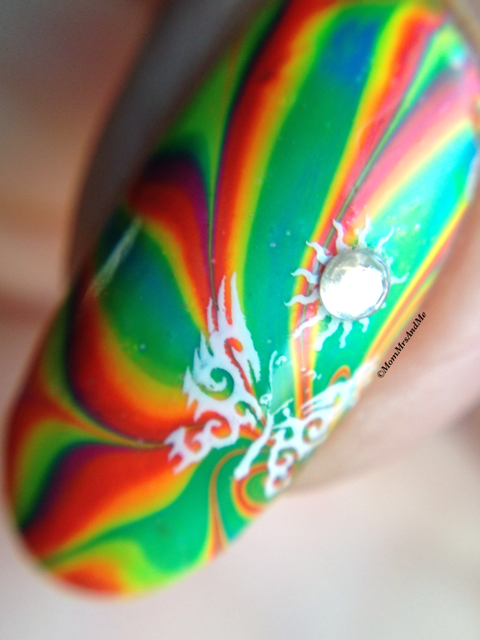
I used the entire Live Love Neon collection by Seventy-Seven Nail Lacquer for the watermarble designs.  I then stamped over using my MoYou White nail polish and a beautiful butterfly design from Plate 212.  Over the sun part of the butterfly image I placed a diamond rhinestone for an added sparkle :)  I totally love how this design turned out!!!

I'm always pleased with MoYou Nails plates and polishes - they all stamp so smoothly!  I've noticed that they pick up with different types of stamper heads, too, which is always nice.  Some of my polishes will only pick up with a super sticky and squishy stamper, others will only transfer on a more solid type of stamper.  All the MoYou Nails polishes pick up with both types so far.  I used my MoYou Nails stamper, which is not too sticky and is stiffer, for all these image transfers in the above designs.

What do you think of these designs?  What are some of the first things that come to your mind when you think of Summer? :)

~~~~~~~~~~~~~~~~~~~~~~~~~

MoYou Nails supplied their stamping plates, polishes, and rhinestones for this review.  Opinions and experiences with the product are my own and are 100% honest.  Results may vary for everyone.


Thursday, April 30, 2015

Challenge Your Nail Art: Windy Weather

So this prompt was definitely - most definitely - a challenge.


I had *no* idea what I wanted to do.  I had *no* idea had to show windy weather via nail art without it being the typical white swirls and such.  Leaves blowing and trees rustling are images that come to mind with windy weather in FALL, not spring, so that was out of the question for me.  My hubs suggested kites, which was brilliant, and I was going to go with that.  But then I had a flashback to my springs in Washington when all the hot air balloon tours started!  I lived in wine country near Seattle, so there were always TONS of those beautiful and colorful balloons decorating the skies.  So, I went with it ^_^


To my knowledge, it's best to fly these when there's a bit of wind present to help move it along.  Don't quote me on that - I've never flown one :P  But it is a happy memory of mine when I think of windy Spring :)  These were all done freehand over Gothic Gala Lacquers "Spectral Kiss."

Short post today - I hope you are surviving your week!  One more day till the weekend!!  And as Justin Timberlake would say (15+ years ago) - "It's gonna be may!" :D

Sunday, April 26, 2015

Stamp One, Stamp All Ten! "Favorite Flower"

I recently joined a nail stamping group on Facebook called "Stamp One, Stamp All Ten!" because I wanted to push and, well, challenge myself to improve on stamping.  I wasn't able to participate in the other challenges this month, but was able to participate in the last one!  The theme for this final prompt for this month is "Inspired by your favorite flower."  I have a number of favorite flowers, but am very limited on what I can stamp due to a small number of stamping plates with flowers on them :P

I settled on a Flowers plate I purchased in a group buy from Ali Express.  There were rose patterns and little flower patterns.  I used "Aunt Beast" by Literary Lacquers for the base color:


I then used white and yellow stamping polish from Moon Nails Supply with the flower images:

 
Yellow roses are my absolute favorite color of rose, and the white flowers are to emulate my favorite garden flower - Alyssum :)

White it's definitely not the prettiest mani I've ever done, I liked having to figure out ways to make the designs work with what plates I have.  I look forward to May's challenges!

What's your favorite nail art style?  Do you favor stamping?


Saturday, April 25, 2015

Earth Day Nails

Good Day lovelies!

Did an Earth Day mani for a nail art group and completely forgot to share it with you all!  I'm so far behind lately - forget March Madness, I've got April Madness >.<  Good thing the month is almost over.

The prompt for Nail Crazies Unite is "Earth Day," and I did a very simple design:


My intent was to emulate that way Earth looks from space :)  I used "The Phantom and the Fly" by Pahlish for the "water," and "Losing Lime" by Carpe Noctem Cosmetics for the "land."  I watermarbled using clear and white nail polish for the clouds/weather.  Since Earth is 71% water, I did most of my nails in blue ^_^

Did you do anything special for Earth Day?  Any fun manis you created?  


Tuesday, April 21, 2015

Leadlighting

I tried out a new (to me) technique last week, and I loved the end result so much, that I didn't take my nail polish off for two and a half days!!!  That's saying something!

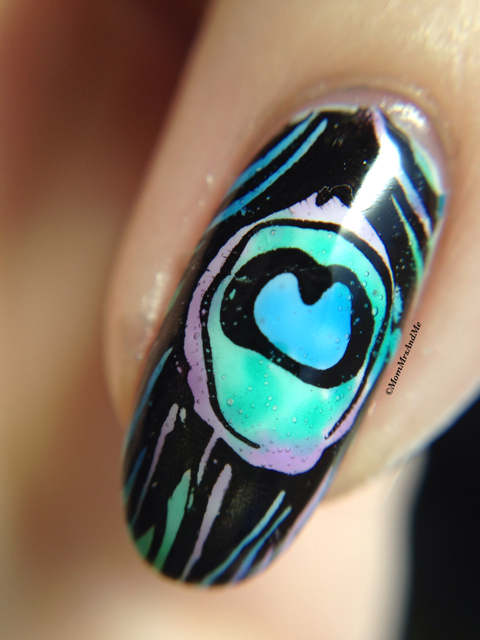
This technique is called "Leadlighting" and there's lots of different ways to do it.  The method I used was putting on a white base color using "Baptism" by Octopus Party Nail Lacquer, stamping an image over that using my black MoYou Nails polish and an image from Born Pretty Store plate number 04, as well as an image from one of my Harry Potter HeHe plates.  I then used blue, green, and purple Soap Bubbles (tinted nail polish) by Esmaltes Da Kelly.  Here is the result:


Pardon the air bubbles - damn you, Phoenix heat!!

I loved how this turned out!!  The colors meshed beautifully together and definitely gave it the Peacock feel ^_^  Now that I've done this technique and I know it looks pretty fantastic, I'll most definitely be playing around with it some more!

Have you ever used this technique before?  What do you think of this look?