Showing posts with label Christmas. Show all posts

Monday, November 28, 2016

Octopus Party Nail Lacquer's Holiday Duo

***Press Sample***

Fresh out of the Black Friday weekend and onto Cyber Monday, I've got a *gorgeous* duo by Octopus Party Nail Lacquer to show you today!!  Let's get right to the swatches!!

"Fir Elise"


Direct Sunlight 
Fir Elise is a gorgeous deep hunter green, opaque in 2 coats.  Really quite a stunner!!  You know how I love my greens <3

"Ring My Belle"


Direct Sunlight
Ring My Belle is a stunning sterling silver holographic, opaque in 2 coats - isn't it just fantastic??

Here's some nail art using the duo:


The duo launched today at 11am EST, and for the first 30 minutes, you can get it for $20 - so RUN, DO NOT WALK, TO THIS SITE:


What are you waiting for??  Go go go!!! <3

~~~~~~~~~~~~~~~~~~~~~~~~~

Polish provided at blogger discount in exchange for photography and a review.

Saturday, November 19, 2016

Simply Earth's November Box!

***Press Sample***

Hello, my dears!

I hope you all had a very Happy Turkey Day, and a very safe Black Friday (if that's your thing - I'm more of a Cyber Monday kind of gal, I just don't do crowds)!  I've got a different kind of post for you today than my usual - I'm reviewing a super sweet essential oils sub box I received from Simply Earth! :D

You may have caught my unboxing video I posted a bit ago.  If not, the link is HERE to give you a rundown of what is contained in November's sub box!

I've been spending my spare moments over the last few weeks diving in and using these fun products and their recipes :)  I find the Happy Oil to be most pleasing to my senses, and the Christmas Blend is making me long for the holiday even more!!  I have to say, though, that the most fun recipe was for scented ornaments, and I enlisted the help of my two oldest munchkins for it :D

First, we made the dough.  Ethan (my oldest) helped me measure out all the ingredients, and I stirred it all together.  Now, this recipe is for scented ornaments, but since it isn't quite Christmas season in my house yet (we have a firm No-Christmas-Till-After-Thanksgiving rule), we opted to make scented aquatic life decorations instead!


After making the dough, I rolled it out and had them help me cut out shapes!  We wore gloves because I wasn't sure if the oil would have an adverse effect on our skin.  It's always a good idea to play it safe, folks!


After cutting out the ornaments, I used a straw to cut out circles towards the top so we could use string to hang them.  And then we baked them!


After baking them, they smelled awesome!! But as is usually the case with my kids (and admittedly, me), we couldn't leave them plain white.  My boys decided they wanted theirs to be red, so they painted one side using acrylic paint (which doesn't have a scent, really, and by only painting one side, we were able to smell the frankincense still).


Once that was dry, they picked ribbon to string through and decided they wanted their animals displayed in the school room :)


It smelled pleasantly in there for a few days!  Which was a welcome change from the usual little boy stink that sits in there after a long day of school and play :P

A few things I noticed about this ornament recipe:

1. As you're stirring your liquid ingredients, even over the heat level suggested on the recipe card, the dough forms VERY quickly, so be mindful of that!

2.  The dough is easy to work with, but when I used a silicone mold, anything with small sections (like branches on a Christmas tree) did not release the dough to me - so I had a Christmas Cyprus tree in the end O_o

3.  The scent is strong, but does dissipate after about 2 days, so if you're looking for something long-term, you won't find it with this recipe.

Other than the above mentioned things, this was a really fun recipe!  I wasn't sure what to expect with the dough, so it was a nice surprise that it was so malleable and easy to work with without crumbling apart after too much handling.  And I had already gone into it assuming the scent wouldn't stick around too much - most "scented" stuff I've made doesn't last a long time, just the nature of the beast.  I had a lot of fun making these with my boys, and would definitely make them again as Christmas gifts :D

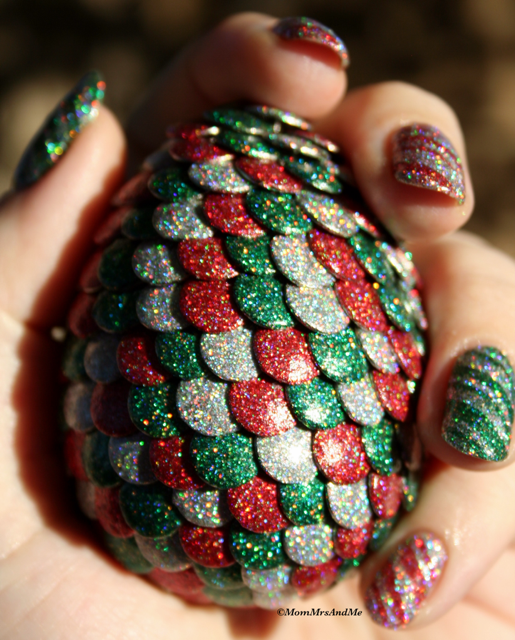
And...well, most of my long-time readers know how much I love nail polish, so...

I painted mine in nail polish ^_^  OF COURSE I DID, c'mon now :P  They look *amazing* and holo and blingy :D  Aw yiss.


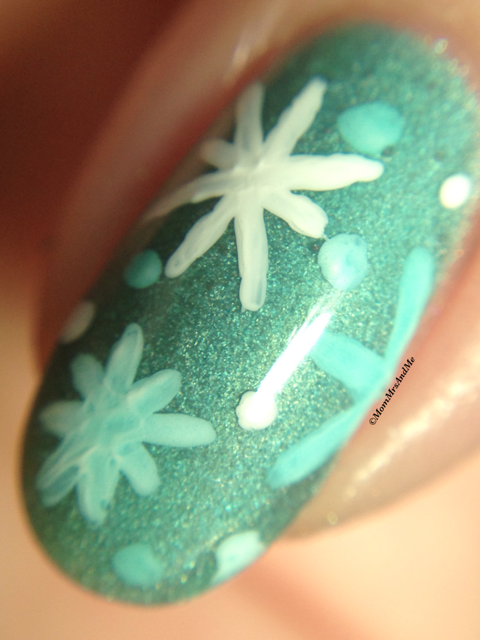
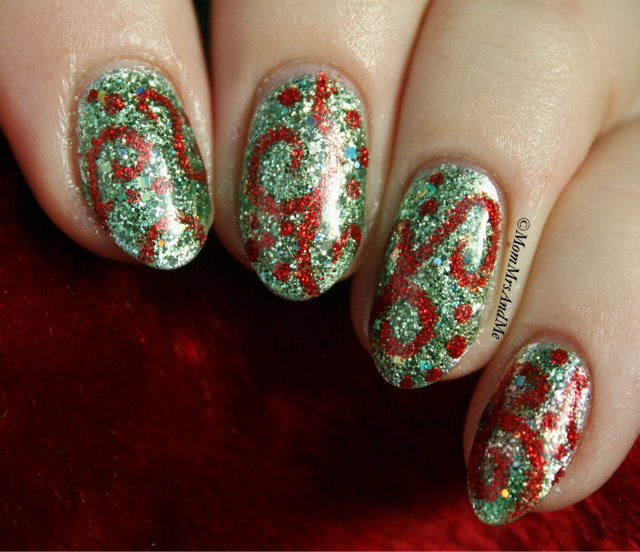
I decided to make "snowflakes" the theme for the other recipes I used from this box, and give them as a Thank-You gift to my sister in law for hosting Thanksgiving this year!  Here are my creations from the recipes included in November's box:

A Christmas Scented Air Freshener using essential oils and baking soda

Two different Christmas Blends to use in a diffuser

Holiday Home Scent Spray to spritz throughout the house

I cannot do bows, y'all.  They always look so sad.

I'm so pleased with this box, it was so much fun to dive into and experiment with everything!  I admit I have never personally seen something so innovative, using essential oils in such creative ways other than just in a diffuser, so this was quite a delightful experience :D

The November box is still available at the following link - if you use the code mommrsfreedif at check out, you'll receive a FREE diffuser with your order! (In order to get the free diffuser, you need to go HERE and add the one you want to your cart - then when you check out, after putting in my special code, it should remove the charge for it :D ).


And here are some social links for you where you can follow Simply Earth:


I would love to know what you think of this box!  Please let me know your thoughts in the comments!

~~~~~~~~~~~~~~~~~~~~~~~~~

The November sub box was sent to me by Simply Earth in exchange for an honest review.

Thursday, December 17, 2015

Gothic Gala Lacquers: Joyeux Noel Trio


So for this holiday season, I really really wanted a trio of the perfect Christmas Green, Red, and Silver, but I wanted microglitter holo bombs...and I knew just who to ask!  Samantha at Gothic Gala Lacquers was more than happy to oblige and came up with this perfect trio for me, which I have named the Joyeux Noel Trio!


The trio consists of a red holographic microglitter called Pere Noel:


A rich green holographic microglitter, Le Sapin De Noel:


And an absolutely perfect silver holographic microglitter called La Fete de Rois:


All of them are opaque in 2-3 coats and dry semi-textured, so I added a thick layer of Ain't Nobody Got Time For That by Digital Nails, which also really helped bring out the holo, too!  And I thought the trio was perfect for a candycane mani ^_^


And, you know, I made a matching dragon egg - I don't need reasons, because dragon eggs are freakin' cool, especially when using microglitter polishes.


I cannot express enough how happy I am with this trio!!  She really nailed it - all three are just perfect :D  

Now, since this is a custom trio, it is not available in her shop for purchase.  However, you *can* WIN a set of these polishes by joining the Gothic Gala Lacquers Fan Group on Facebook!  All you have to do is create a Christmas/Winter themed mani using two Gothic Gala Lacquer polishes, and you can submit up to 3 manis.  The contest is open until December 21st, so there are still 4 days left!!

You can also order a custom polish directly from the Gothic Gala Lacquers website and have her craft something AMAZING for you!!  

What do you think of this trio?  And what do you think of her spiffy new bottles??  Bigger size AND much easier to store ;)  Let me know in the comments! <3

~~~~~~~~~~~~~~~~~~~~~~~~~

Nothing to disclose - polishes purchased by me.


Wednesday, December 2, 2015

Challenge Your Nail Art: Snow Day

It's that time again - time for the 12 Days of Christmas Nail Art, hosted by the awesome Challenge Your Nail Art group on Facebook!!


I realized I didn't have any winter themed stamping plates (something I recently rectified with Black Friday sales ^_^ ) so I went with a hand painted snowflake pond mani.  I used Crown of Queen Elizabeth by Octopus Party Nail Lacquer as the base, freehanded snowflakes with white acrylic paint between layers of Parker (ring finger) and Amy, both by Creative Cuticles Nail Polish.


Make sure you check out the other fabulous designs by the members of this group!!  <3

~~~~~~~~~~~~~~~~~~~~~~~~~


Tuesday, December 23, 2014

Challenge Your Nail Art: Freestyle

Well the day has come - the final challenge theme for this round of designs.  It is bittersweet - while this has certainly taken up quite a bit of free time this month, is has been so much fun creating all this art with such am amazing and talented group of women!!


For today's prompt, I decided to go with something a little less crazy, and a little more fun.  I wanted to paint Rockefeller Square, but subtly :)  I have never been there myself, but every time I see beautiful, giant Christmas trees I think of it in all the pictures and movies I've seen Rockefeller in.  So I wanted to paint that, and this is what I came up with:


It's very simple, not too incredibly detailed, because I wanted the feeling more than the features.  I used all of the new winter colors by Model City Polish in variation (background color, color accents, etc).  The rest is acrylic paint.  I'll have a blog post for you tomorrow featuring all the polishes I used in this design :)

Be sure to check out the other beautiful works of art below!!  Have a wonderful day - see you soon <3


Wednesday, December 17, 2014

Challenge Your Nail Art: Glitter

Pretty sure it's safe to say that anything glitter is a huge hit in the nail community :D  I have yet to come across someone who DOESN'T like glitter.  You can imagine, then, the excitement from all the ladies in this nail art group who saw today's theme:


I am surprised the universe hasn't exploded yet from this prompt :P  I was pretty excited for it - so much so that I have *2* designs to show you! In the first design, I used my polish from the Festive Fortification Box and created a twist on the traditional candy cane nail design:


I used nail tape to make the smooth lines - I couldn't freehand that accurately straight to save my life :P  While this design has gorgeous glitter polish, it just was glittery enough for me.  So, I came up with this design:


I used a silver polish for the base coat and topped it with "Guys and Galaxies" by Nicole by O.P.I.  I then used my O.P.I. sheer tints and layered them to make the green color over the glitter (about two coats of the blue tint and two of the yellow tint on top).  I freehanded the red swirls using a red glitter art polish by Salon Perfect.  And there you have it!

The biggest aggravation with glitter polish (aside from trying to remove it) is trying to photograph is AND capture all its sparkle.  The fact is, it just won't happen.  My second mani is soooooooooo sparkly, and I just couldn't convey that through my pictures.  So I guess you'll just have to trust me ;)

Hope you enjoyed this design!  Be sure to check out the other glittery goodness through the links below!  See you soon <3