Showing posts with label Born Pretty Store. Show all posts

Friday, May 6, 2016

Born Pretty Store Holographic Glass Paper

***Press Sample***

I'm so pleased to bring you this post :D  When I got in this press sample from Born Pretty Store I had a very creative idea on how to use it, but was unsure if it would translate well.  I'm happy to tell you...it sure as hell did!!

Source
Most of the amazing manis I've seen done using holographic glass paper have been the "shattered glass" look.  I was intending on doing that with this press sample, but I got to thinking...There's *got* to be something else to do with this paper.  It can't just be for one type of mani.  So I set out on a mission, and it was one I knew would either work out, or fail miserably.  I'm happy to report that I turned that Mission: Impossible into a Mission: F*cking OWNED!

Source
So first I'll show you step-by-step (day by day, a fresh start over -...sorry) of how I created this look, then I will show you the final mani :D  SQUEE!

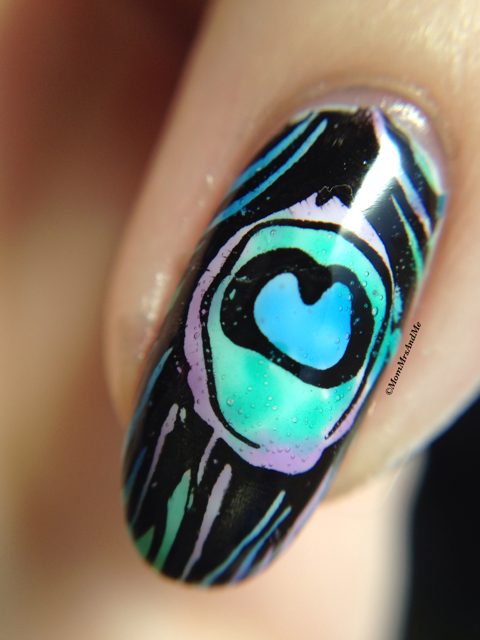
First, I did a base of "Tremedeira Perolado" by Gio Antonelli (I have no idea if that's actually what it's called, the bottle is all in Spanish and I got it in a clearance section of a stockist, so that is my best guest on the name) on my pointer, middle, and pinky fingers.  On my ring and thumb, I did a base of "Blue Lagoon" by Pretty Serious.  I stamped with my Born Pretty Store clear stamper using "#1457" by Drip Drop Nail Paint and "Cayuga" from M Polish with butterfly images from my MoYou London The Pro Plate 05.


My next steps get a little fancy and possibly complicated, so bear with me...

I used my mini UberChic black mat and stamped the wing close-up image on one of the nails to use as a guide.


I then cut a small square from the long piece of holographic glass paper and placed it over the design.


Next, I used a light orange sharpie to trace parts of the wing.


Yes, that is the same paper - it looks more blue/pink when on a white background, and more blue/oil spill on a dark background.  Anyway, you can see the individual pieces traced out.  I then cut them out and placed them back on the guide to make sure they (roughly) matched.


Then...I spent an hour repeating this two more times, then transferring the pieces to my nails to create this:


I give you SHATTERED BUTTERFLY WINGS!!  YAHS!!!!!!!! I am so f*cking proud of this, guysssss!!!!!  And I cannot believe how much easier it was to work with the glass paper than I initially thought.  As long as you don't heavily exhale or sneeze onto your mat (that may or may not have happened...) while you have the pieces cut, it's actually not bad!!  And the results are amazing!!  I love these so much, I'm gonna leave this design on my nails FOR THE WEEKEND.

Yeah, that's right.

So there are a few things I want to touch on about the holographic glass paper.  Despite what it appears to be on the website, you get a LOT of this paper.  Seriously, a LOT:


I was expecting a small square of it, but I got this beast, and let me tell you - a little bit goes a long way, so this product will last you a while.  It is most definitely worth the money.  I've tried a few other shiny cellophane type paper like this, and it all just didn't work as easily - it was either too static-y or too rigid, etc.  This paper was excellent.

Another thing - it sits super smooth on my nail.  One coat of topcoat, and it's smooth - no corners sticking up or anything (though I made sure when I was putting the pieces on that there were no corners).

Overall, I would absolutely 100% recommend this product if you're looking to make a super cool shattered anything mani :D

If you'd like this particular product, you can find it at the following link with several different color options (the one in the pictures is #4)


And you can find even more nail art products (and then some!) at the main store page here:

Use the discount code in the below image for 10% off your entire order ;)


So...I *gotta* know - what do you think of this mani??  Let me know in the comments!

~~~~~~~~~~~~~~~~~~~~~~~~~

Holographic Glass Paper was sent to me by Born Pretty Store for nail art and a review.  My experience with the product is unique to me and my full disclosure remains 100% honest.  

Oh hey, btw!!  Have you entered my super awesome giveaway yet? ;)

a Rafflecopter giveaway

Saturday, April 16, 2016

Born Pretty Store Review: Chameleon Polish

***Press Sample***

Yesterday was a crazy blustery day here, which means I inhaled a lot of tree sperm and am now suffering the allergy consequences.  Woo-hoo.


Recently, I received some fun products from Born Pretty Store to play with and review for you!  One of those products was a bottle of Chameleon Nail Polish Varnish #33

Born Pretty Store Chameleon Polish

Born Pretty Store Chameleon Nail Polish

Born Pretty Store Chameleon Polish

Now I know the website says "black base color needed," but I chose to use a different color instead.  Because I'm a rule breaker.  

Born Pretty Store Chameleon Polish Swatch

Born Pretty Store Chameleon Polish Macro

Born Pretty Store Chameleon Polish Swatch

Born Pretty Store Chameleon Polish Nail Art

Born Pretty Store Chameleon Polish Macro

Born Pretty Store Chameleon Polish Nail Art

I used "Unwind" by Pipe Dream Polish as the base color.  I then used "Straight & Narrow" vinyls from Polished Vino to create the straight lines and painted the Chameleon polish inside on my ring and middle fingers.  I also used the Chameleon polish for the accent dots on my pointer and pinky fingers.  The gems connecting the two sections also came from Born Pretty Store, but those were purchased by me a while back.

Overall, regarding the polish, I found it actually built itself up to create the desired chameleon effect without needing that black base coat.  I'm wearing three thin layers in the photos, but I'm pretty sure that two thick coats would do it.  The only downside to the polish is the price - $10.99 for a 6ml bottle seems a bit hard to swallow, though it would be well spent, because the polish is quite great :)

You can purchase this polish HERE, and you can use my discount code below for 10% off your purchase! :D  
Mom Mrs And Me Born Pretty Store Discount Code

What do you think of this polish?  How about the mani I created with it?  Let me know in the comments below!

~~~~~~~~~~~~~~~~~~~~~~~~~

Polish was sent to me by Born Pretty Store in exchange for an honest review.  My opinions and experience with the polish are unique to me and my review remains 100% honest with full disclosure.


Thursday, April 14, 2016

Gothic Gala Lacquers "Conquer" and "Darkest Kiss"

***Press Sample***


This has most definitely 100% been the definition of my 2016 thus far.  Especially recently.  Lots of lots of road blocks.  I will go into more detail at a later time when shit gets sorted, but until then, please know I love and appreciate each and every one of my readers and followers, and thank you for sticking with me through my long absences!!

Let's get to some polish :)

Gothic Gala Lacquers sent me two polishes for swatching, and they are both pretty fantastic :D  Let's start with "Conquer:"


Sun Shot

Conquer is a beautiful gunmetal grey glitterbomb with blurple flakies throughout.  Opaque in 2-3 coats, depending on how thick you apply.  I am wearing two coats in the photos above with a topcoat of Smooth Me Over (also by Gothic Gala Lacquers).  It is inspired by Robin Roberts' Oscars gown, shown here:

The second polish is "Darkest Kiss:"


Darkest Kiss is a deep one-coater black matte polish with scattered holo throughout.  The ring finger in the photos above shows the polish without a topcoat.  

Because Darkest Kiss was a one-coater, I was pretty sure that meant it would stamp well, and I was right!  A fellow GGL swatcher, Sparklepuss Polish, and I did a "twin" mani using Darkest Kiss over an older GGL color from 2014 "Remember, Remember."  We used heart images from Born Pretty Store Plate 50 (you can use my code MUMQ10 for 10% off your Born Pretty store order).

Here's the result:


And I couldn't just stop there, I really wanted to use Conquer in some way...So I came up with thism using Darkest Kiss as the base, Conquer as the accents, and a Rose vinyl from What's Up Nails;


You can pick up Conquer and Darkest Kiss at the Gothic Gala Lacquers store, linked below - don't forget to use my discount code MOMMRSANDME25 for 25% off your order :D  


What do you think of these polishes?  Do you think she nailed Conquer?  Let me know in the comments below! <3

*For all swatches and nail art, I used OPI Nail Envy as my basecoat.  Here is the affiliate link where you can purchase it for a much cheaper price than drug and beauty stores:


~~~~~~~~~~~~~~~~~~~~~~~~~

Polishes were sent to me by the maker for photography purposes.  All experience with the polishes are my own and my disclosure remains 100% honest.

Tuesday, April 21, 2015

Leadlighting

I tried out a new (to me) technique last week, and I loved the end result so much, that I didn't take my nail polish off for two and a half days!!!  That's saying something!

This technique is called "Leadlighting" and there's lots of different ways to do it.  The method I used was putting on a white base color using "Baptism" by Octopus Party Nail Lacquer, stamping an image over that using my black MoYou Nails polish and an image from Born Pretty Store plate number 04, as well as an image from one of my Harry Potter HeHe plates.  I then used blue, green, and purple Soap Bubbles (tinted nail polish) by Esmaltes Da Kelly.  Here is the result:


Pardon the air bubbles - damn you, Phoenix heat!!

I loved how this turned out!!  The colors meshed beautifully together and definitely gave it the Peacock feel ^_^  Now that I've done this technique and I know it looks pretty fantastic, I'll most definitely be playing around with it some more!

Have you ever used this technique before?  What do you think of this look?