Showing posts with label Nail Stamping. Show all posts

Sunday, January 15, 2017

Bad Bitch Polish "Night Out" Valentine's Duo

***Press Sample***

Happy Sunday, y'all!!  So far my weekend has been just as busy as this January so far.  I dunno about you, but this "new year" for me is turning out to be more of my last year >.<  I'm working hard to turn the tables around though!  In the next few weeks, I'll be breaking out something pretty nifty that I'm super excited about :D  Sorry (not sorry) for the Vagueblogging :P

So let's get to some polish already, sheesh!

Bad Bitch Polish created an absolutely fantastic "Night Out" duo consisting of two to-die-for cremes that not only look amazing on their own, but also stamp!!!  Check them out!

Here is "The Lover"


The Lover is a sexy, sophisticated red that is a one-coater.  It's gorgeous, and a must-have for red fans!!  Shown here in one coat with topcoat under Ottlite.  In the interest of full disclosure, this polish is highly pigmented and can stain.  I didn't personally experience any staining, but I also wear a base coat (OPI's Nail Envy) and I put cuticle oil around my cuticles beforehand (I've noticed I tend to have an easier time cleaning up that area of stray polish if there's an oil base).  Just wanted to make sure it was known that staining *is* a possibility, and the listing on the website states this as well.

And here is "The Spouse"


The Spouse is a lovely sweet bubblegum pink, also a one-coat-wonder!  I'm wearing one coat in the photos above with topcoat under an Ottlite.

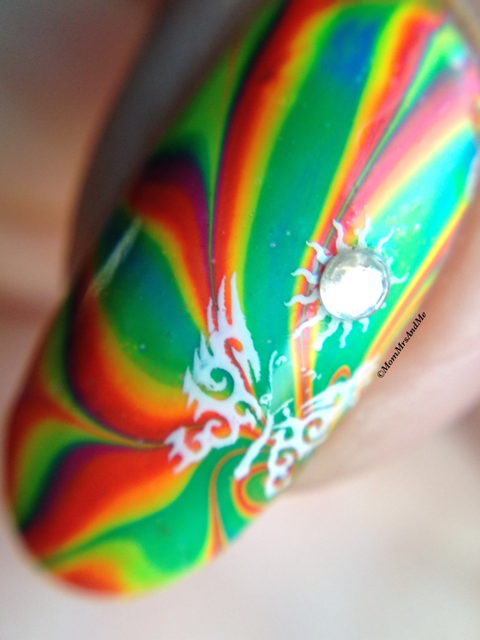
And here are photos of each stamped over one another:


As stamping polishes, these were really, really easy to work with.  They spread out nicely, and also picked up nicely on my stamper (I use a sticky squishy stamper from Jolie Polish).  The images transferred very well, too - I didn't have to re-do any of my nails or try more than once to get the image to transfer from the plate to the stamper.  Two polished thumbs wayyyy up for these!

The Night Out duo is available now!!  Here's where you can get your hands on them and follow the brand:


So whatcha think??  Do these tickle your fancy?  Let me know in the comments below! <3

~~~~~~~~~~~~~~~~~~~~~~~~~

Polish sent to me by maker in exchange for photos and an honest review.

Friday, April 15, 2016

Nail Art with DRK

I'm feeling like Super Poop today, so I'm gonna make this short and sweet :)  I decided to create a mani using several products from recent purchases that were too awesome to leave sitting on my shelf of nail art paraphernalia.  Here is the result!


Base Coat: "Joyful" by Parrot Polish (desk clear, not available in the shop)
Stamping Polish: "Sangria" by DRK
Holographic Accent Polish: "Rainbow Spill" by Polish Your Dreams
Glitter Accent Polish: "Wish" by Cupcake Polish

I'm pretty pleased with how this turned out :)  Honestly had no idea what I was going to do, just kind of went along with it as it happened.  What do you think of this mani?

Tuesday, June 23, 2015

Summer Designs with MoYou Nails!

***Press Sample***

I don't now if YOU know this, but Father's Day this year was also the first official day of summer!  So I created two nail designs to celebrate the new season using MoYou Nails stamping plates, polish, and rhinestones ^_^

The first design is based off one of my top favorite images that come to mind when I hear the word "summer" - sailing!


I did a gradient using "Lei It Again" and "Rum Me The Right Way" by KBShimmer, and painted a wave pattern using "In Yacht Water," also by KBShimmer.  To get the subtle waves look, I used a holo topcoat and OPI's Nail Envy in a watermarble pattern.  I then used my MoYou Nails Black nail polish to stamp the boat silhouettes, and a dark blue stamping polish from somewhere (I honestly don't recall, it's in an unmarked tiny bottle) for the dolphin silhouettes, all from MoYou Nails Plate 70.  I painted a light grey inside the dolphin lines because they just looked odd as outlines :P  I topped it all with my OPI Matte topcoat, and I'm pretty pleased with the end look ^_^

My second design is a bit more fun :)  One of my favorite activities I remember doing as a kid in the summer was making tie-dye t-shirts and whatnot.  So I thought I'd re-create a nail design to sort of emulate that look:


I used the entire Live Love Neon collection by Seventy-Seven Nail Lacquer for the watermarble designs.  I then stamped over using my MoYou White nail polish and a beautiful butterfly design from Plate 212.  Over the sun part of the butterfly image I placed a diamond rhinestone for an added sparkle :)  I totally love how this design turned out!!!

I'm always pleased with MoYou Nails plates and polishes - they all stamp so smoothly!  I've noticed that they pick up with different types of stamper heads, too, which is always nice.  Some of my polishes will only pick up with a super sticky and squishy stamper, others will only transfer on a more solid type of stamper.  All the MoYou Nails polishes pick up with both types so far.  I used my MoYou Nails stamper, which is not too sticky and is stiffer, for all these image transfers in the above designs.

What do you think of these designs?  What are some of the first things that come to your mind when you think of Summer? :)

~~~~~~~~~~~~~~~~~~~~~~~~~

MoYou Nails supplied their stamping plates, polishes, and rhinestones for this review.  Opinions and experiences with the product are my own and are 100% honest.  Results may vary for everyone.


Sunday, April 26, 2015

Stamp One, Stamp All Ten! "Favorite Flower"

I recently joined a nail stamping group on Facebook called "Stamp One, Stamp All Ten!" because I wanted to push and, well, challenge myself to improve on stamping.  I wasn't able to participate in the other challenges this month, but was able to participate in the last one!  The theme for this final prompt for this month is "Inspired by your favorite flower."  I have a number of favorite flowers, but am very limited on what I can stamp due to a small number of stamping plates with flowers on them :P

I settled on a Flowers plate I purchased in a group buy from Ali Express.  There were rose patterns and little flower patterns.  I used "Aunt Beast" by Literary Lacquers for the base color:


I then used white and yellow stamping polish from Moon Nails Supply with the flower images:

 
Yellow roses are my absolute favorite color of rose, and the white flowers are to emulate my favorite garden flower - Alyssum :)

White it's definitely not the prettiest mani I've ever done, I liked having to figure out ways to make the designs work with what plates I have.  I look forward to May's challenges!

What's your favorite nail art style?  Do you favor stamping?


Saturday, April 18, 2015

Guest Post: Nadia of Mama Hearts Polish!

We're interrupting your regularly scheduled blog post to bring you a special guest post from the lovely and talented Nadia of Mama Hearts Polish!!  You will *love* how gorgeous her design turned out!!

~~~~~~~~~~~~~~~~~~~~


radial-gradient-flower-stamping-essie-dj-play-that-song
Essie DJ Play That Song

Hi guys! I hope you're all having a lovely weekend. Today I'm taking over Shawna's blog as guest blogger and she's taking over mine. We decided to do a bestie twin nails look, both inspired by this design from IG user @opalliegh18.

In addition to swatches and nail care, my blog is about simple nail art and this is about as complicated as it's going to get. The design is a radial gradient with a flower image stamped on top. I came up with the idea of using neons and black stamping, instead of dark cremes and white stamping like the original, that way it's inspired by and not an exact copy.

essie-im-addicted-circle-gradient-nail-art
Essie I'm Addicted

This was my first time doing a radial gradient and my original choice of neons, green and pink, where not turning out right. They where blending together to create a muddy green color. It was not pretty or neon looking. So I dug through my stash and realized I don't own that many neons, obviously, that has to fixed. However, I was able to pull out Essie DJ Play That Song and I'm Addicted which are from previous neon collections, the first from 2013 and the latter from 2014. Now, I know these aren't the most brightest of neons but in terms of pigment, they are true neons, they both dry to a semi matte finish and pop with a white undie. I have swatches and reviews of both of these colors on my blog, here's DJ Play That Song, and here's I'm Addicted (these are from last year so my nails are super nubby).

radial-gradient-floral-stamping-uberchic-102-macro

To finish the look I used what looks like a type of rose design from UberChic 1-02 stamping plate with Wet N Wild Black Creme. My topcoat smudged the stamping a bit, which I'm annoyed about but at least you can't really tell unless you look at the macro.

So what do you guys think of our recreations? Let us know in the comments below. Have a great weekend!

Stalking is encouraged! Go follow Mama Hearts Polish at BloglovinFacebookInstagram, and Pinterest

~~~~~~~~~~~~~~~~~~~~

So PRETTY!!  I *love* the colors she chose, and that she had the same plate!  Very lovely - thank you Nadia for crashing my blog! <3  Be sure to check out my post over at her blog today to see my design!